Updated 07.10.2019: nginx directives
I received many requests to roll out Collabora without Docker, because many Users do not have a Plesk-VPS which is able to run Docker.
More and more Service Provider are working with Virtuozzo-Container or something similar where Docker will not run or is not installable.
Now I want to help you to become ready for Collaboration in Nextcloud.
After a long search in different other blogs, play around with various scripts and resetting my testservers (oh what a fun), I have found something what I’m not looking for and I’m surprised how easy it is 😉
Before you start, please note that you have a valid backup of your VPS!
If you do not have an external backup target, you can contact me for rent a S3-Target.
I usually use the editor nano to edit files, but you can also vi or vim. If you want to use nano, you may need to install it:
apt install nano
Requirements:
-
- root-access via ssh
- Working Nextcloud installation with Collabora online app
- Empty subdomain created in Plesk and secured with SSL
- no running service on port 9980, check with
netstat -tulpen | grep 9980
Step 1: Compiling Collabora
No, we don’t have to compile Collabora (Thx Collabora)
Collabora have released packages for Ubuntu 16.04 and 18.04, Great!
All you have to do is execute the following commands, depending on your Ubuntu Release:
16.04 LTS:
apt install apt-transport-https
apt-key adv --keyserver keyserver.ubuntu.com --recv-keys 0C54D189F4BA284D
echo 'deb https://www.collaboraoffice.com/repos/CollaboraOnline/CODE ./' >> /etc/apt/sources.list
apt-get update && apt-get install loolwsd code-brand
18.04 LTS:
apt install apt-transport-https
apt-key adv --keyserver keyserver.ubuntu.com --recv-keys 0C54D189F4BA284D
echo 'deb https://www.collaboraoffice.com/repos/CollaboraOnline/CODE-ubuntu1804 ./' >> /etc/apt/sources.list
apt-get update && apt-get install loolwsd code-brand
That’s it
Step 2: Config of Collabora
In this step we have to do the following:
-
- allow the nextcloud-instance to interact
- set the admin-credentials
- make letsencrypt-certs readable to collabora
First edit the configuration-file of Collabora:
nano /etc/loolwsd/loolwsd.xml
and add the following lines into the storage-section:
<host desc="Regex pattern of hostname to allow or deny." allow="true">127\.0\.0\.1</host>
<host desc="Regex pattern of hostname to allow or deny." allow="true">nextcloud\.your-domain\.tld</host>
next set proto in the net-section to IPv4.
and set seccomp in the security-section to false
in the admin_console-section edit the credentials for admin-user:
<username desc="The username of the admin console. Ignored if PAM is enabled.">admin-name</username>
<password desc="The password of the admin console. Deprecated on most platforms. Instead, use PAM or loolconfig to set up a secure password.">your-password</password>
Save File now.
Because lool-user does not have read-rights to the path where letsencrypt-files are stored and we don’t want to edit Plesk-System-Rights, we create a script to copy the files and change the owner to lool-user:
nano /etc/cron.weekly/collabora_certs
add the following content and adjust the FQDN:
#!/bin/bash
cp /opt/psa/var/modules/letsencrypt/etc/live/office.your-domain.tld/cert.pem /etc/loolwsd/cert.pem
cp /opt/psa/var/modules/letsencrypt/etc/live/office.your-domain.tld/privkey.pem  /etc/loolwsd/key.pem
cp /opt/psa/var/modules/letsencrypt/etc/live/office.your-domain.tld/chain.pem /etc/loolwsd/ca-chain.cert.pem
chown lool /etc/loolwsd/cert.pem
chown lool /etc/loolwsd/key.pem
chown lool /etc/loolwsd/ca-chain.cert.pem
systemctl restart loolwsd.service
exit 0
Save File and make it executable:
chmod +x /etc/cron.weekly/collabora_certs
Execute script to copy the certs for the first time:
/etc/cron.weekly/collabora_certs
and check if Collabora is running and listen on port 9980:
systemctl status loolwsd.service
netstat -tulpen | grep 9980
You can control collabora with the following commands:
systemctl status loolwsd.service
systemctl start loolwsd.service
systemctl stop loolwsd.service
systemctl restart loolwsd.service
Install German Spelling (thx to Chris):
apt update
apt install hunspell locales-all hunspell-de-de
systemctl restart loolwsd.service
Step 3: vHost-Settings in Plesk
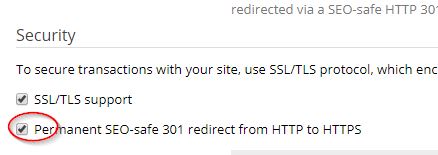
Set the hosting settings in the configured subdomain as follows, disable PHP support and activate 301 redirect in Hosting Settings:
 In the appropriate subdomain, insert the following code under „Apache & nginx settings“, in the „Additional nginx directives“ section:
# static files
location ^~ /loleaflet {
	proxy_pass https://127.0.0.1:9980;
	proxy_set_header Host $http_host;
}

# WOPI discovery URL
location ^~ /hosting/discovery {
	proxy_pass https://127.0.0.1:9980;
	proxy_set_header Host $http_host;
}

# Capabilities
location ^~ /hosting/capabilities {
	proxy_pass https://127.0.0.1:9980;
	proxy_set_header Host $http_host;
}

# main websocket
location ~ ^/lool/(.*)/ws$ {
	proxy_pass https://127.0.0.1:9980;
	proxy_set_header Upgrade $http_upgrade;
	proxy_set_header Connection "Upgrade";
	proxy_set_header Host $http_host;
	proxy_read_timeout 36000s;
}

# download, presentation and image upload
location ~ ^/lool {
	proxy_pass https://127.0.0.1:9980;
	proxy_set_header Host $http_host;
}

# Admin Console websocket
location ^~ /lool/adminws {
	proxy_pass https://127.0.0.1:9980;
	proxy_set_header Upgrade $http_upgrade;
	proxy_set_header Connection "Upgrade";
	proxy_set_header Host $http_host;
	proxy_read_timeout 36000s;
}
and disable proxy-mode under nginx settings (not use Apache2)

Step 2 finished.
Step 3: Activate Collabora in Nextcloud
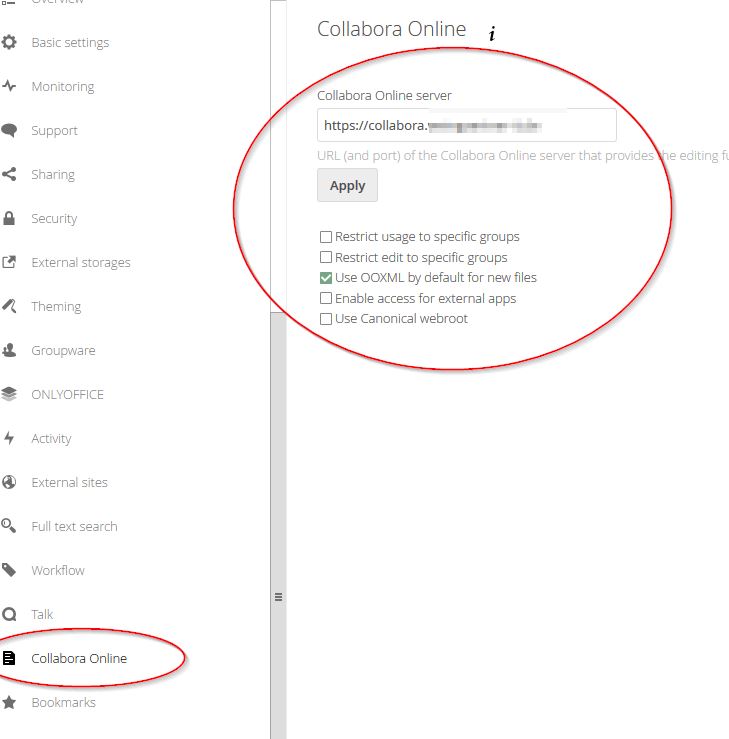
Activate the Collabora Online app in Nextcloud and enter the subdomain created in Plesk.

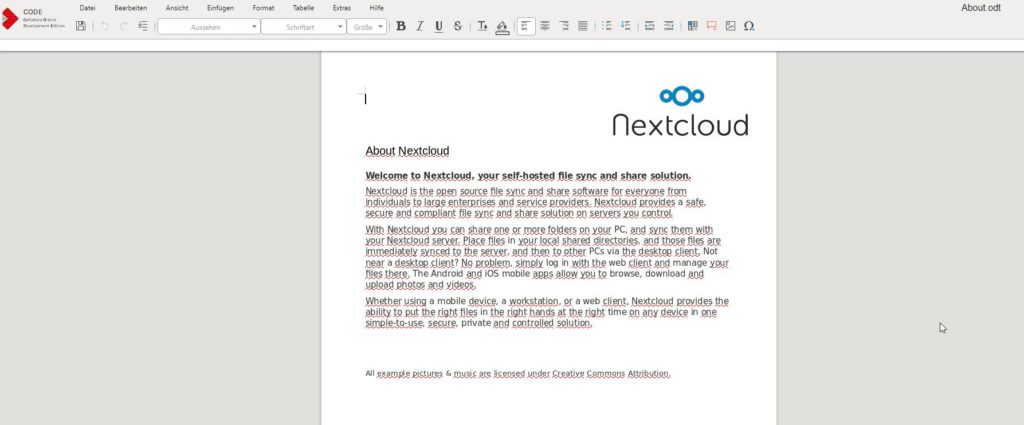
Now you can edit any document directly in the browser:

Under the following URL you will find the Admin-Console of collabora:
https://office.your-domain.tld/loleaflet/dist/admin/admin.html
Where you can adjust a few things.
That’s it and have fun! 😉
Sources:
