Changes 23.03.2019
– Added instructions for shared Hosting with .htaccess-file
Currently there are two free webmail solutions in Plesk that I personally do not prefer. Therefore, I had the idea to implement RainLoop Webmail as a third solution for me.
If anyone want to follow me, here is how to do it.
Step 1: Domain Preparation in Plesk
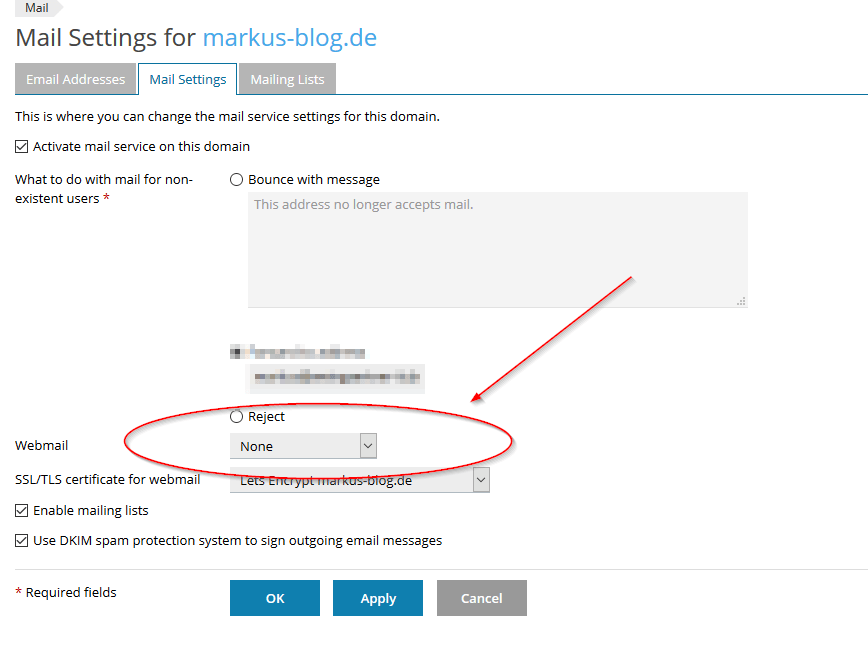
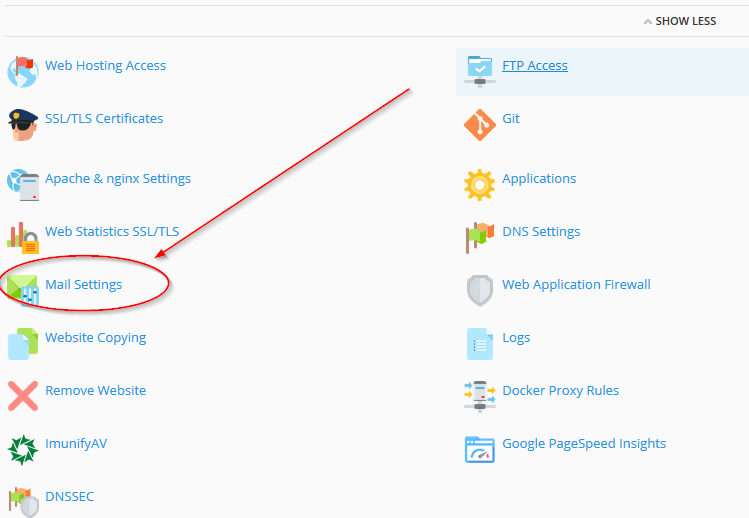
We go to our domain and open Mail Settings
in Plesk:
There we have to change the Webmail
-Application to None
and confirm with OK
:
Step 2: Add Subdomain for webmail
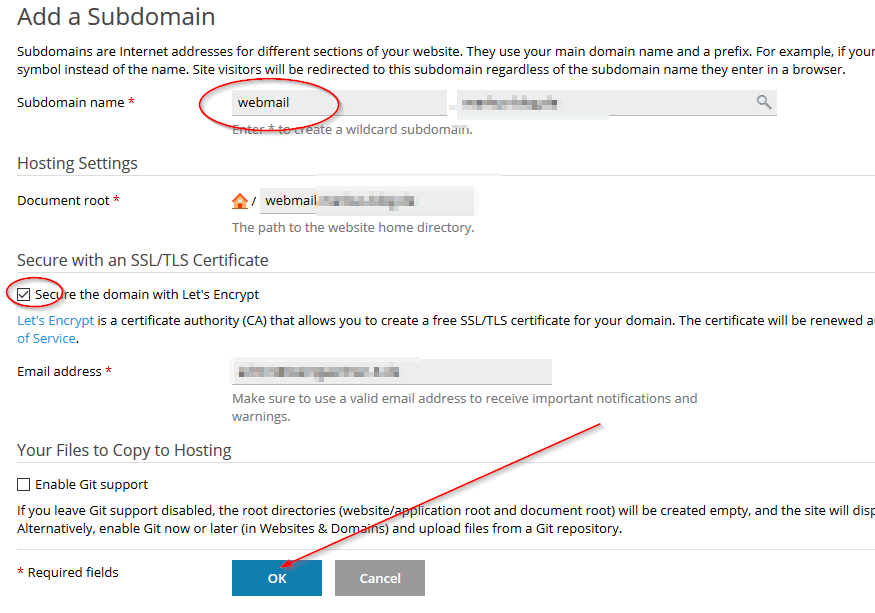
In the next step we will create the new Subdomain for webmail, I will use webmail
, but you can choose any name you want, do not forget to Secure the domain with Let's Encrypt
:
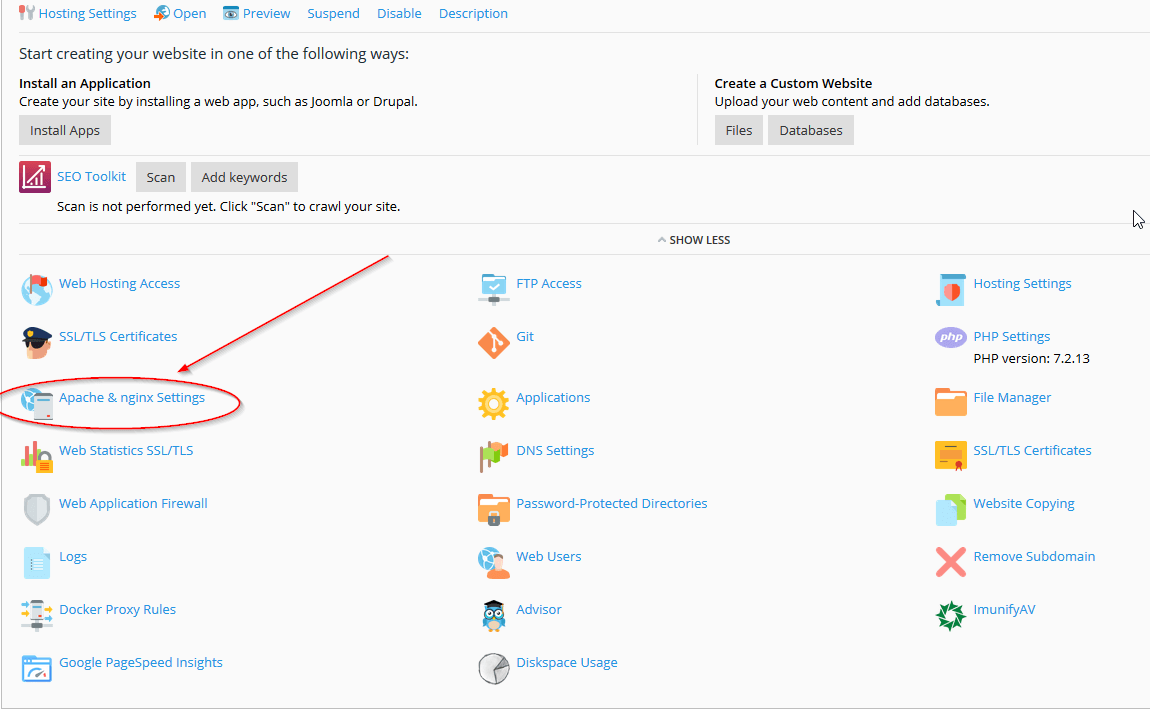
When the subdomain has been created, we will adjust the Apache & nginx Settings
:
disable the Proxy Mode
to turn off Apache2:
and we add the following code to Additional nginx directives
to ban access to the data directory of Rainloop, which we will create later:
location ^~ /data { deny all; }
It should look like this:
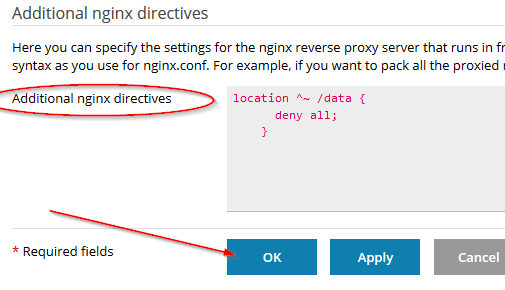
Confirm with OK
.
If you are on shred Hosting and do not have the right to adjust directives, you have to create a .htaccess-file in data-directory with ftp or file-manager.
The content should be:
# line below if for Apache 2.4 <ifModule mod_authz_core.c> Require all denied </ifModule> # line below if for Apache 2.2 <ifModule !mod_authz_core.c> deny from all Satisfy All </ifModule> # section for Apache 2.2 and 2.4 <ifModule mod_autoindex.c> IndexIgnore * </ifModule>
Step 3: Create Database for Contacts in Rainloop (optional)
This step is optional because Rainloop can store contacts within its own SQLite instance even without a MySQL database.
We add a Database in our subdomain by clicking Add Database
:
and we enter the required values, for example the following ones (Please note the username, password and database name):
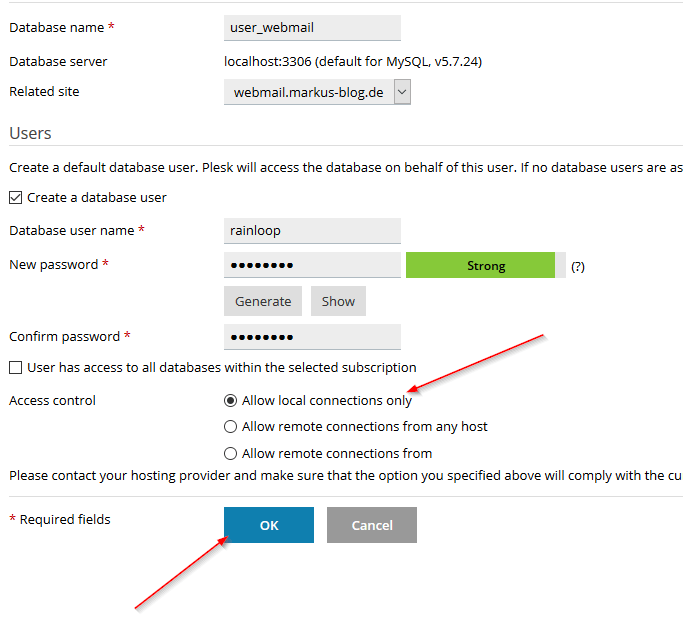
Confirm with OK
.
Step 4: Installation of RainLoop Webmail
First we have to download the Installer-Script here.
Then we go to File Manager
in our Subdomain, Select
and Remove
all Content:
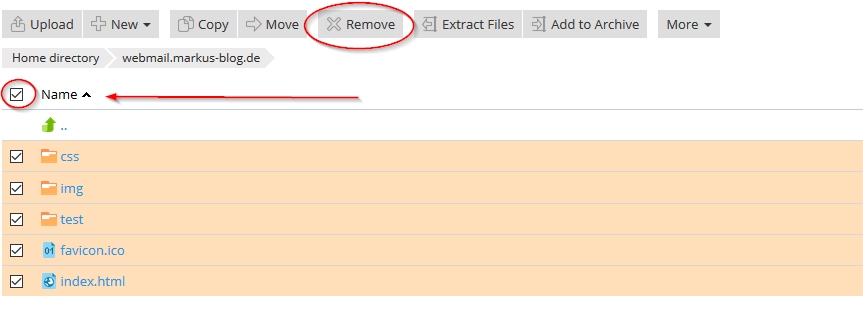
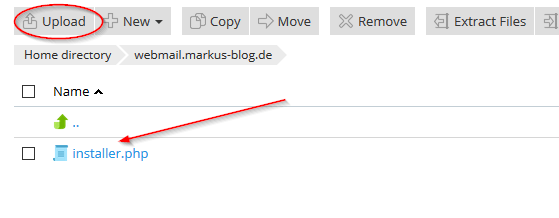
Upload the downloaded Installer-Script (installer.php
):
and call the installer.php
in your webbrowser: https://webmail.yourdomain.tld/installer.php
. This will create the following output:
Step 5: Configuration of RainLoop Webmail
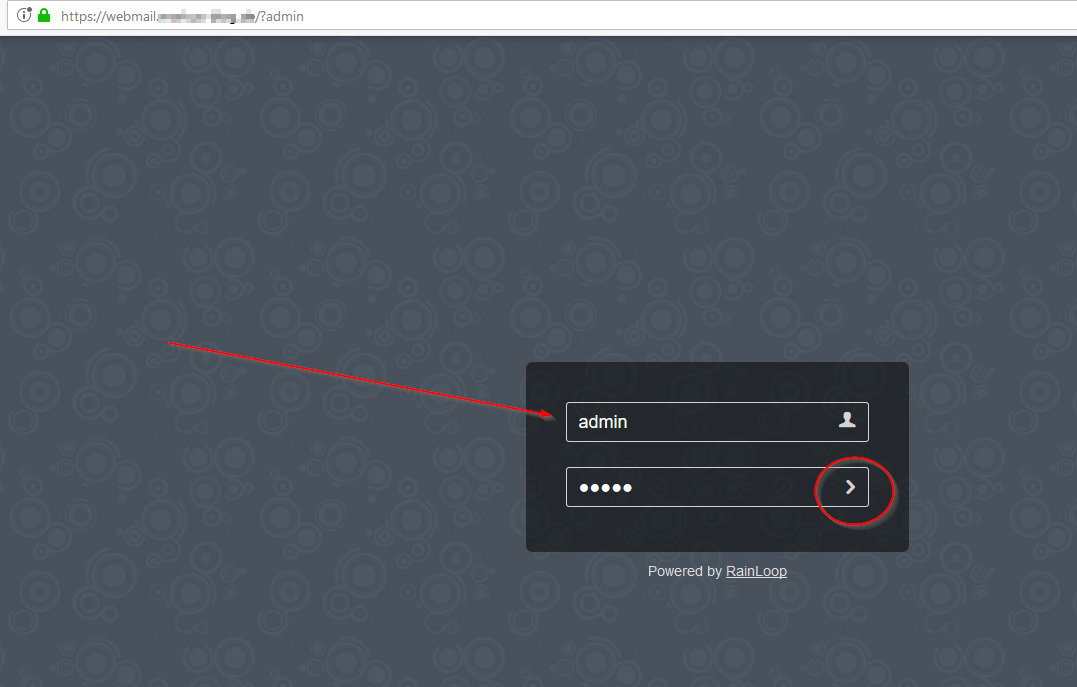
To configure our new RainLoop Webmail Solution, we have to enter the admin interface:
https://webmail.yourdomain.tld/?admin
the default credentials are admin
with password 12345
:
First of all we should change the credentials in the Security
-Tab and enable Two-Factor-Authentication:
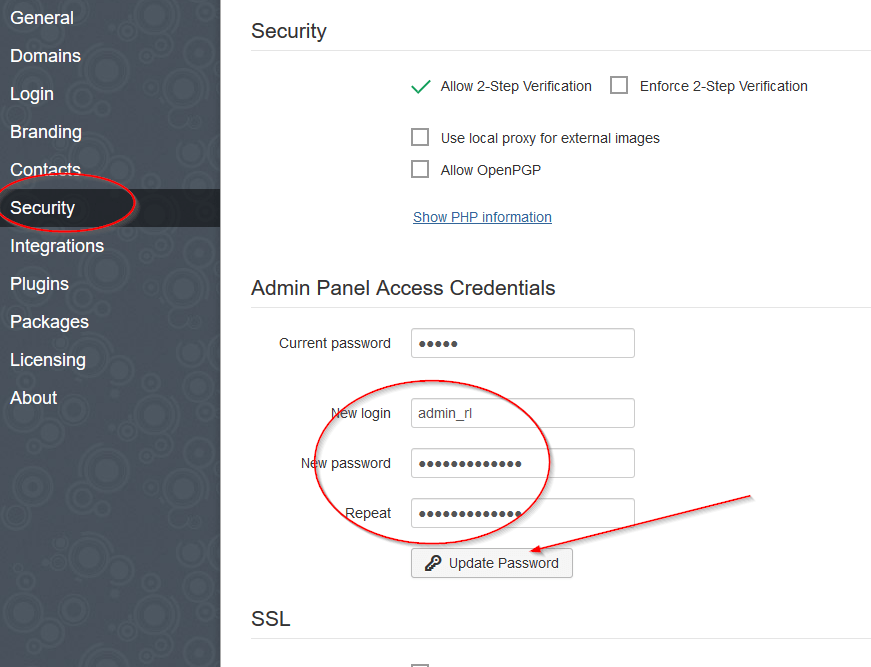
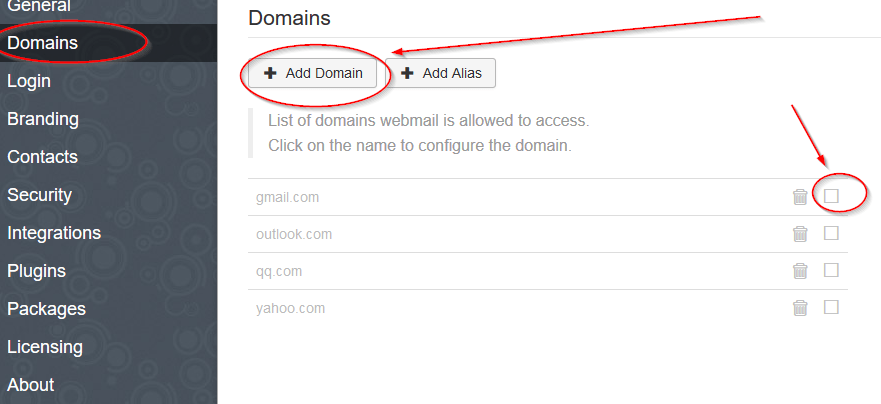
Before we will able to use Webmail, we have to add the domain or domains you want to allow to use RainLoop in the Domain
-Tab and do not forget to disable or delete active domains (as example gmail):
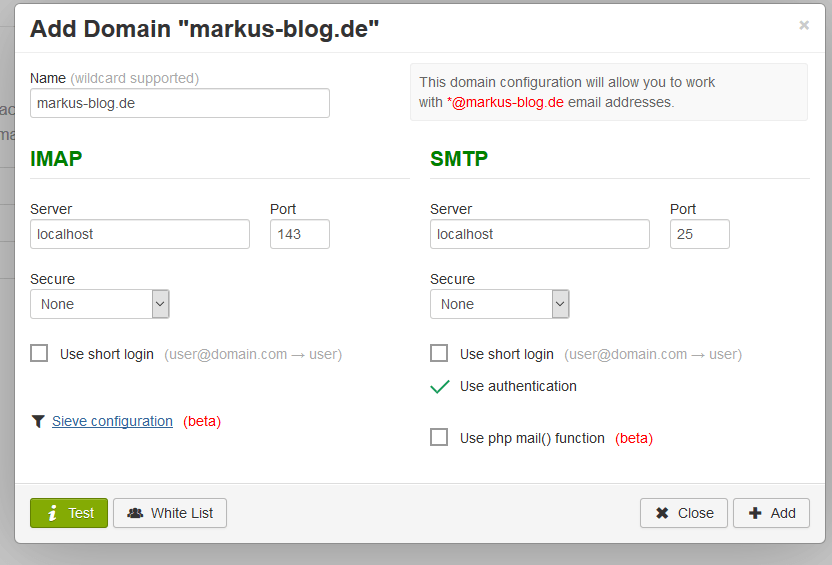
In the next dialog we have to enter the required information to connect to our mailserver per imap and smtp, I will use no encryption, because I use my local mailserver. When you use an external mailserver please use encryption!
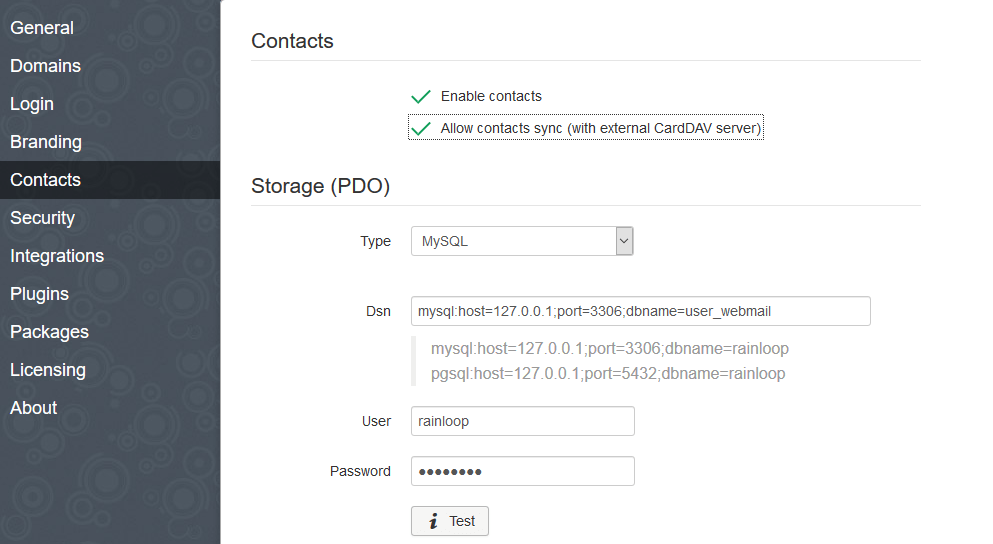
Next we go to Tab Contacts
and activate them. We do not forget to enter our Database-Connection if we create a MySQL-Instance for RainLoop in Step 3:
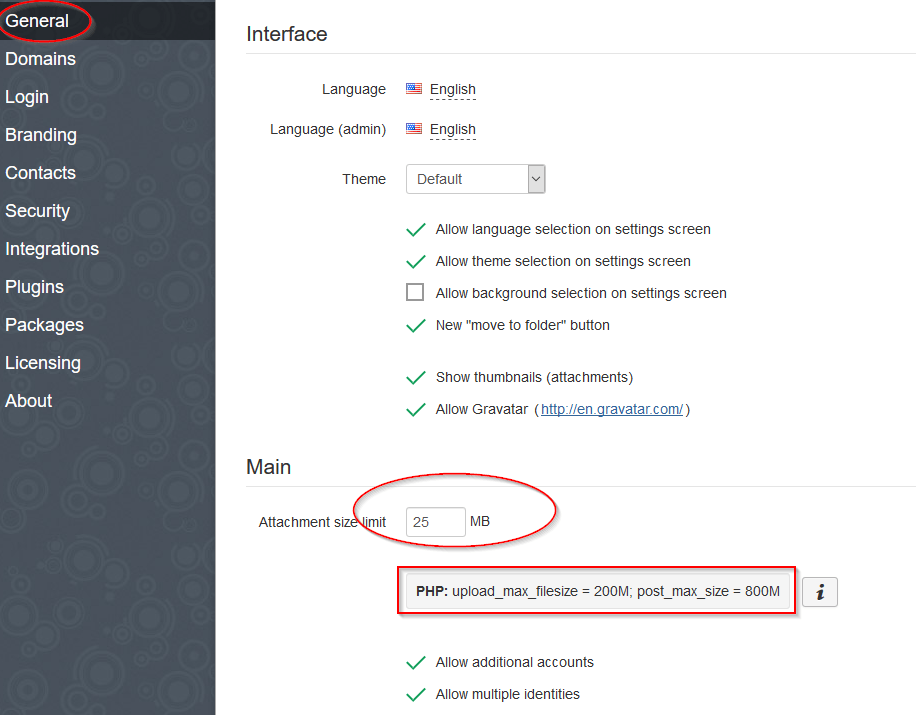
In the Tab General
we may adjust Attachment size limit
and Interface
Settings for example Language
:
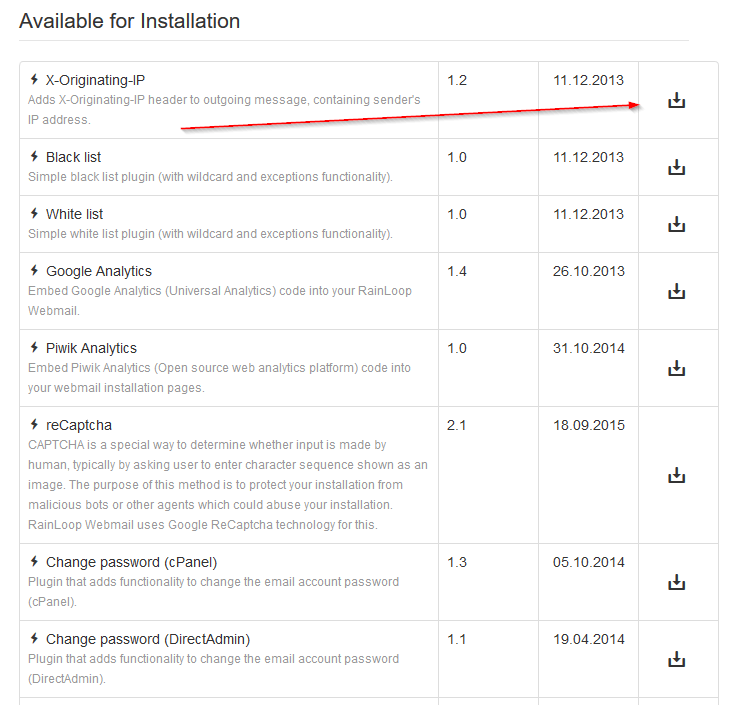
and in the Plugins
Tab we are able to activate Plugins:
which we can install in the Packages
Tab:
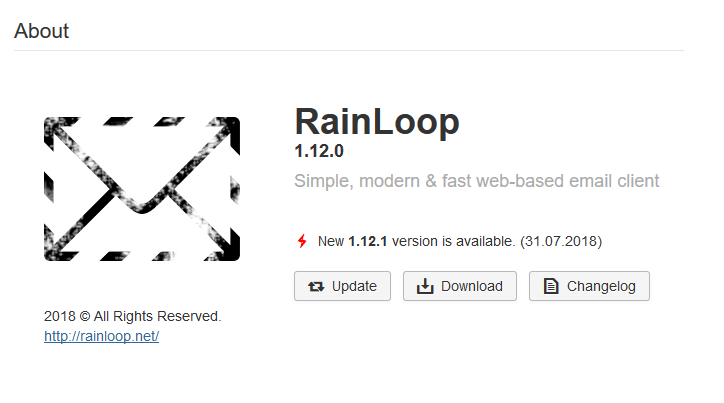
In the Tab About
, we should check for an update:
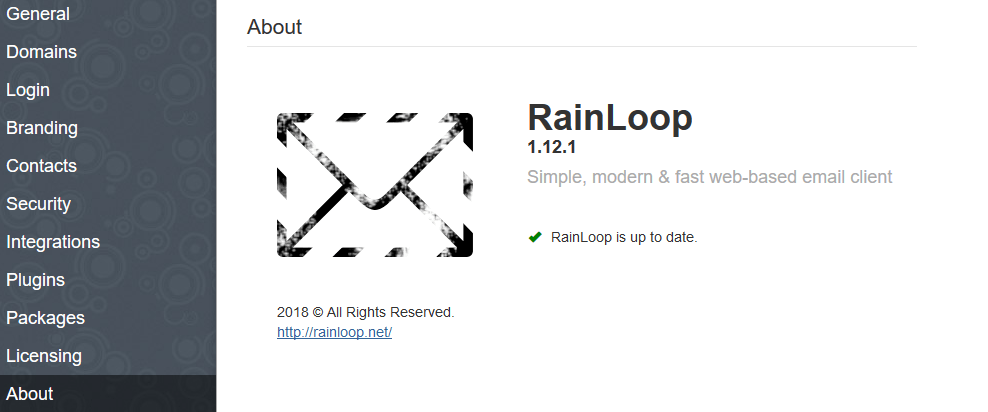
If an update is available, we can install it by clicking Update
:
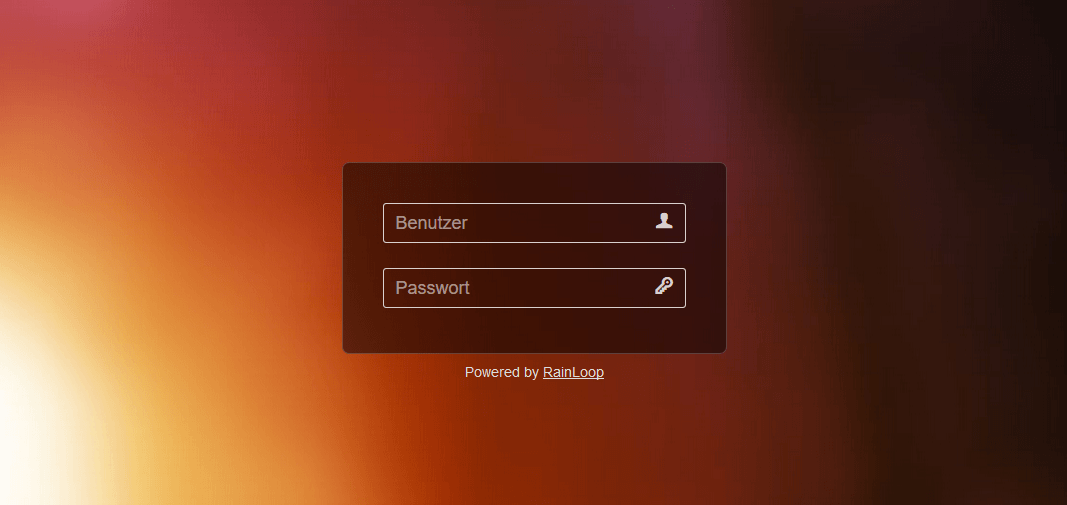
Now our new RainLoop Webmail is available at our Subdomain https://webmail.yourdomain.tld:
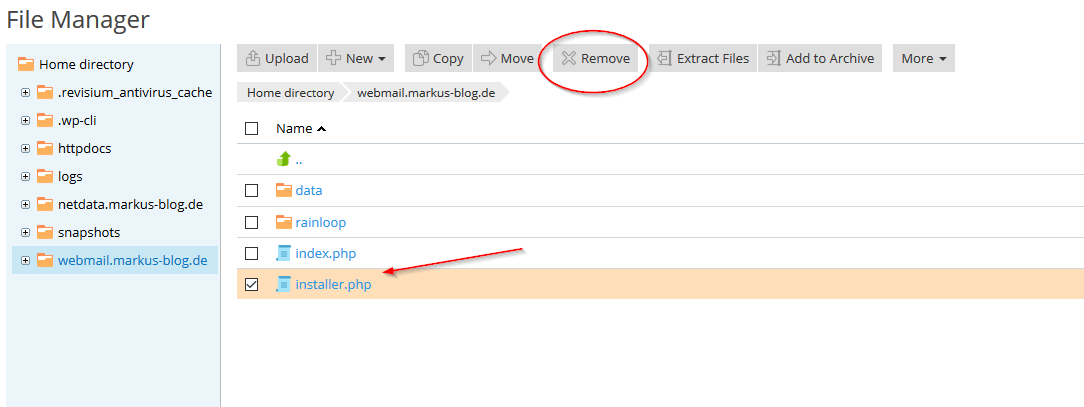
At the end of this step we have to remove the installer.php in the webspace of our Subdomain with the File Manager:
If we want to use this webmail for other domains, we can follow the next step to register RainLoop as Webmail Solution in Plesk.
Step 6: Configuration of Plesk (optional)
In this step we will register the new Webmail Solution in Plesk.
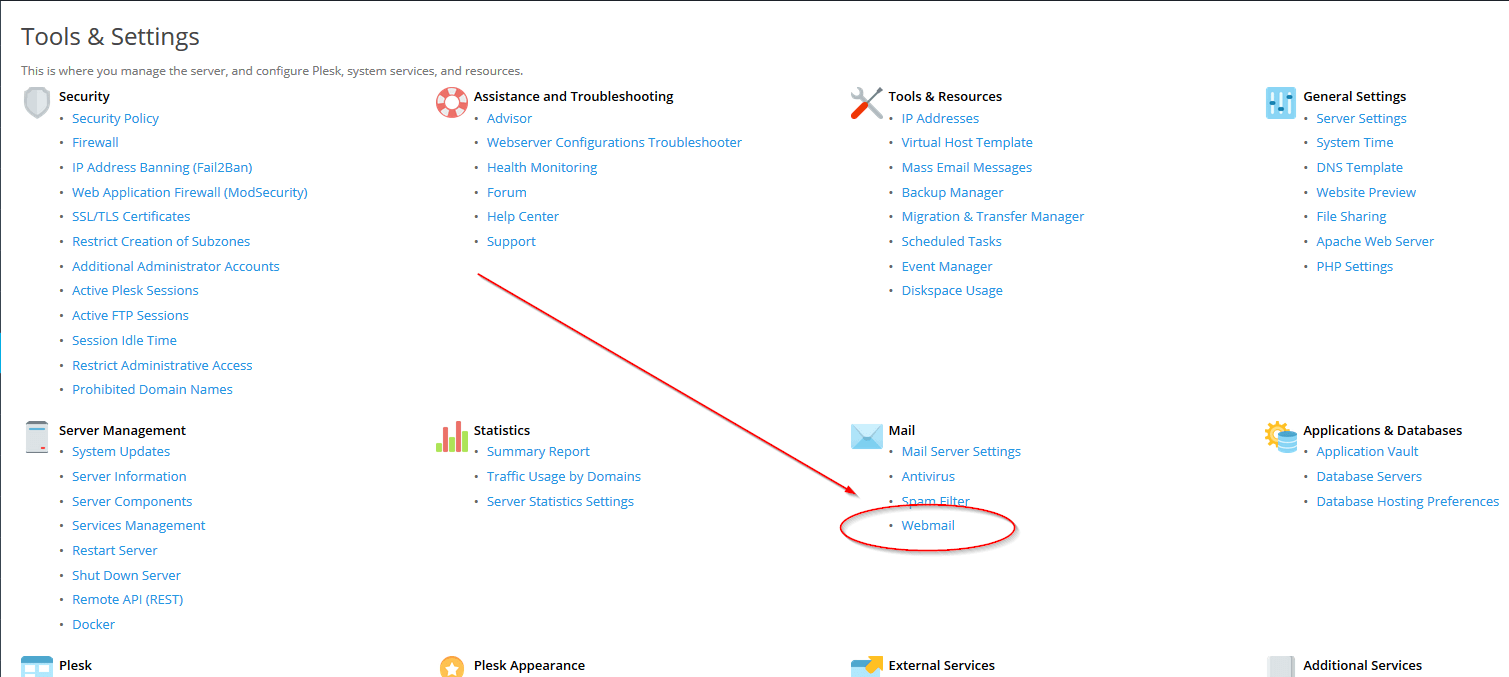
Go to Tools & Settings
and Webmail
under Mail
in Plesk
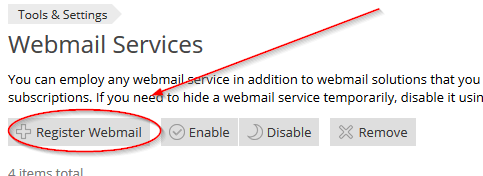
and in the next dialog we will add our RainLoop with Register Webmail
:
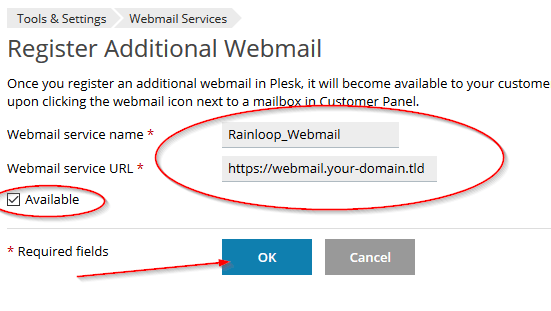
and enter our URL and Webmail-Name:
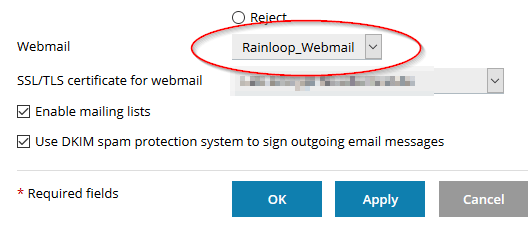
Now we can change the Webmail
in other domains in Mail Settings
:
Finished 🙂 Try it out, Share it and don’t hesitate to contact me. See you soon…
18 Gedanken zu „How to install and register RainLoop WebMail as Service in Plesk“
Hallo danke für deine Anleitung, allerdings habe ich paar Fragen:
1. Man soll diese .htaccess File erstellen und ins „data“ speichern. Aber „data“-Ordner existiert ja noch nicht. Auch wenn soll man den Subdomain Ordner leeren, wegen der Installation. Ich habe es nachinein gemacht richtig ? Allerdings kommt weiterhin die Fehlermeldung „Warnung RainLoop data folder is accessible“
2. Bei Datenbank funktioniert die Verbindung mit „localhost“ nicht. Erst wenn die Option „Allow remote connections from any host“ gesetzt ist und die IP genommen wird.
3. Bei Add Domain funktioniert „localhost“ nicht. Außer bei SMTP. Bei IMAP musste ich den IMAP Server angeben. Dann wird bei mir alles Grün.
4. Bei mir ist das max erlaubt: „PHP: upload_max_filesize = 8M; post_max_size = 8M“ ist das problematisch?
5. Die neue Rainloop Version wird erkannt, sobald ich auf „Aktualisieren“ klicke kommt diese Fehlermeldung „Cannot access the repository at the moment.“
6. Ich finden den Reiter für die Registration vom Webmail nicht.
Ergebnis: Authentifizierung fehlgeschlagen auf der Loginseite -> Ich kann mich nicht einloggen.
Bei meiner allgemeinen Tests hatte es mal funktioniert, allerdings mit hotmail.de account.
Nachdem ich alles frisch gemacht haben klappt es nicht. Muss irgendwie Dienste neustarten? (Via SSH? Wenn Ja welche Befehle funktionieren? Denn bei mir stehr nur „bash“ und kennt keinen Befehl)
Hallo,
zu 1, natürlich erst, wenn der Ordner existiert.
zu 2, kommt auf den Hoster an, wenn er ein Multiserver hat (DB, WEB, Mail getrennt), dann kann das sein. Ich kann leider nicht alle testen und hier ist es ein Single-Plesk-Server 😉
zu 3, siehe 2
zu 4, Ergo kannst Du nur 8 MB-Dateien anhängen
zu 5, konnte ich noch nicht nachstellen
zu 6, das liegt daran, dass Du nicht vollständig Adminrechte auf dem Plesk-Server hast.
Das Tutorial ist hauptsächlich für Plesk-Server mit vollem Zugriff gedacht, es kann bei Hosting funktionieren, aber eventuell auch nicht.
Gruß
Markus
Moin,
unter der aktuellen Version von Plesk gibt es den Haken mit dem Proxy Mode nicht und auch nicht den Punkt Additional nginx directives. Wenn ich dann nun in die .htaccess die Werte eintrage und versuche den Installer auszuführen gibt er mir den Fehler aus, dass er nicht in das Repository konnte.
Ideen?
Danke Dir.
Hi, wenn Du die Einstellungen für nginx in plesk nicht hast, dann ist nginx nicht installiert.
Versuche den Installer auszuführen und erst danach die .htaccess zu befüllen.
Gruß Markus
Good one!
Hallo Markus,
Bei mir hat alles wunderbar geklappt danke dafür!
Leider musste ich feststellen das ich mich mit meinen Emails leider nicht anmelden kann …
Bekomme den Fehler: Diese Domain ist nicht zugelassen.
Aber im Admin Panel hat das Einrichten und testen ohne Probleme geklappt.
Vielen Dank schon einmal im voraus!
Außerdem kann ich unter den Email Einstellungen meiner Domain nicht Rainloop-Webmail auswählen.
Leider ist Roundcube etc. auch nicht mehr in der Liste.
Folgender Satz steht in grau unter der Auswahl: Es besteht eine Subdomain mit dem Namen webmail.meine-domain.de.
In der Domain, in der Du Webmail installiert hast unter https//:webmail.xyz.de kannst Du diese nicht auswählen, sie ist ja schon da.
In anderen Domains (wenn Du Dein webmail.xyz.de im Plesk registriert hast) kannst Du die Auswahl natürlich weiterhin tun.
Hallo Yanni,
da prüfe noch mal im Admin-Interface, ob da wirklich alles stimmt.
Gruß
Markus
Hallo,
habe nur ne ganz kurze Frage. Du nutzt ja Netcup (zumindest ist bei mir selbst das Interface komplett identisch)
Weiß hier jemand ob das ganze auch funktioniert wenn man nur ein normales Webhosting hat und keinen Server?
Vielen Dank Bene
Hallo,
Ich vermute eher umgekehrt. Netcup nutzt Plesk. ?
Sollte funktionieren. Kann nur sein, dass Du die nginx-direktiven nicht setzen kannst. Dann musst Du den Umweg über .htaccess gehen.
Gruß Markus
Stimmt genau was du sagst. Ich kann die nginx-direktiven nicht setzten. Wie sähe denn der Umweg über .htaccess aus? Also klar hab ich ne .hataccess datei aber was muss ich mit der machen?
Danke für die Hilfe 🙂
Gerne.
Du musst eine im Verzeichnis data anlegen:
Sollte funktionieren, wenn netcup das zulässt.
Gruß
Markus
Thanks for the article. I’ve got everything to work except the registration for other domains. I’ve followed your steps as above but when trying to access webmail.otherdomain.tld which references the original webmail.domain.tld I’m presented with the default plesk page.
Hi Chris, your welcome.
When you Register this webmail for other Domains it is reachable over the webmail.domain.tld not over webmail.otherdomain.tld. If you want this you have to install another instance of rainloop. I will look for a solution to make it reachable in all domains, but this will take time.
Regards Markus
If you do not care about webmail.otherdomain.tld being redirected to webmail.domain.tld then you can use this solution:
https://support.plesk.com/hc/en-us/articles/360002954973-How-to-redirect-webmail-of-all-domains-to-a-specific-secured-webmail
Die Anleitung hat sehr gut funktioniert! Danke, dass ich hier immer wieder einiges dazulernen kann!
Sogar meine Nextcloud-Kontakte habe ich nun mit Rainloop synchronisiert.
Hast du eigentlich auch schon die Rainloop- App für die Nextcloud ausprobiert? Leider fehlt da eine (eigentlich sehr naheliegende) Möglichkeit, Dateien direkt aus der Nextcloud als Anhang verwenden zu können.
Hallo Chris,
Danke für das regelmäßige Ausprobieren und das treue Lesen 🙂
Die App hatte ich schon mal ausprobiert, aber außer, dass sie in der Nextcloud läuft, sehe ich keinen Vorteil.
Das wäre ein Feature, das sicherlich sehr interessant wäre.
Gruß Markus