
Changes 23.03.2019
– Added instructions for shared Hosting with .htaccess-file
Currently there are two free webmail solutions in Plesk that I personally do not prefer. Therefore, I had the idea to implement RainLoop Webmail as a third solution for me.
If anyone want to follow me, here is how to do it.
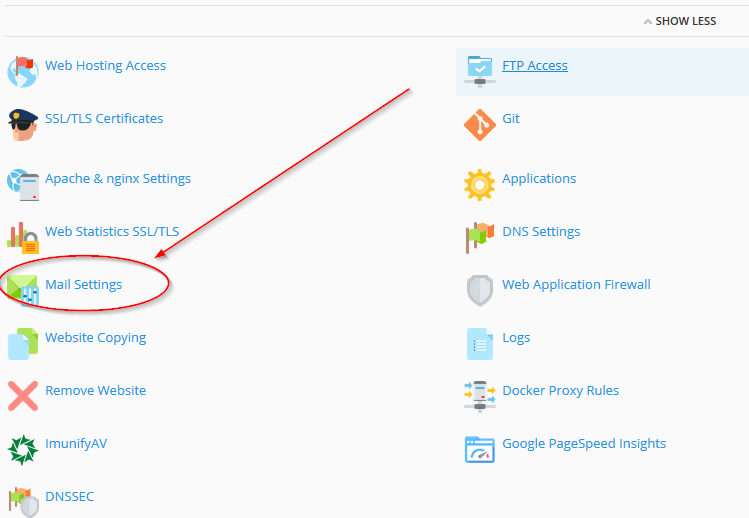
Step 1: Domain Preparation in Plesk
We go to our domain and open Mail Settings in Plesk:
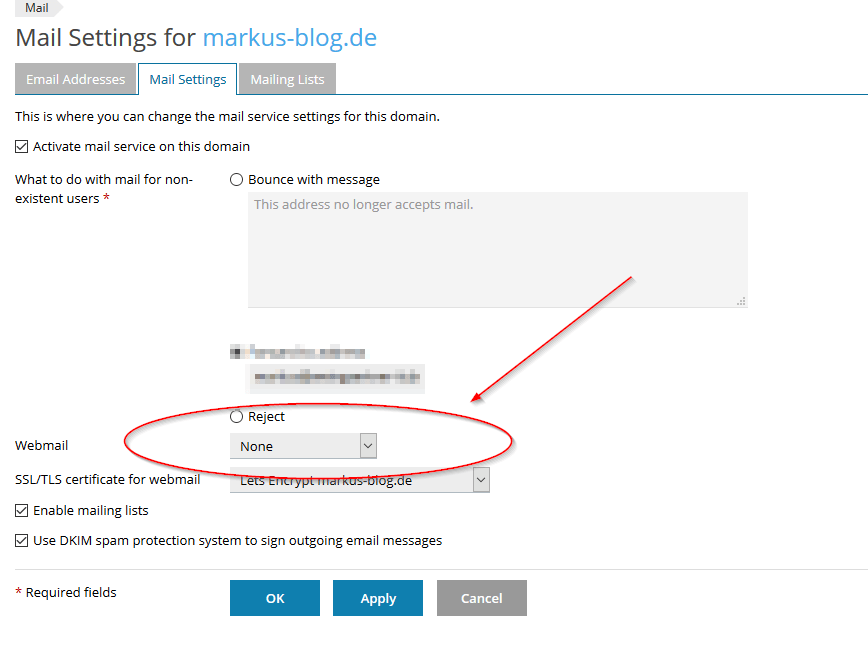
There we have to change the Webmail-Application to None and confirm with OK:
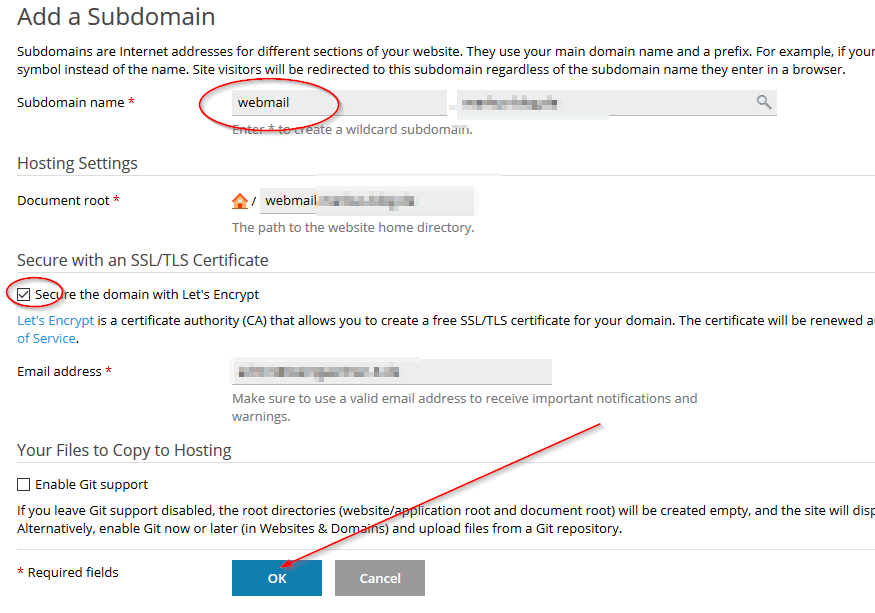
Step 2: Add Subdomain for webmail
In the next step we will create the new Subdomain for webmail, I will use webmail, but you can choose any name you want, do not forget to Secure the domain with Let's Encrypt:
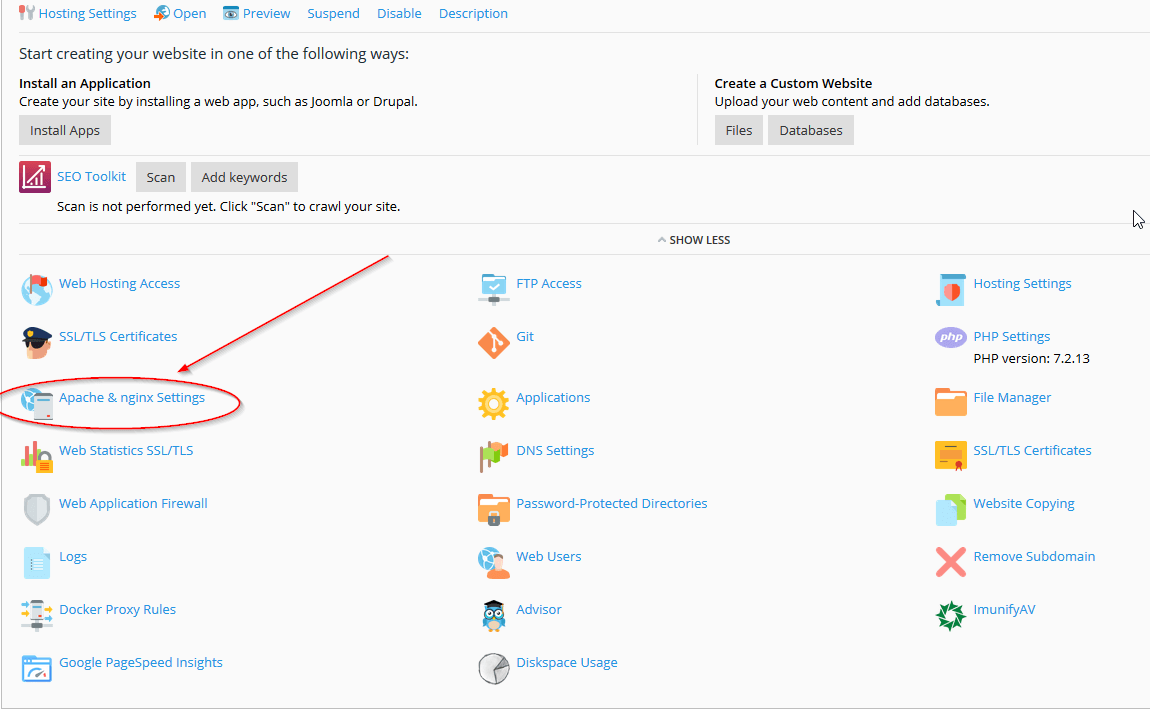
When the subdomain has been created, we will adjust the Apache & nginx Settings:
disable the Proxy Mode to turn off Apache2:
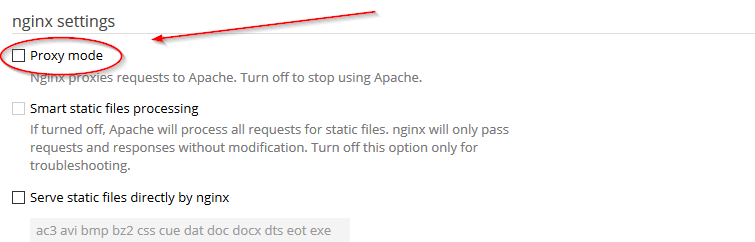
and we add the following code to Additional nginx directives to ban access to the data directory of Rainloop, which we will create later:
location ^~ /data {
	deny all;
}
It should look like this:
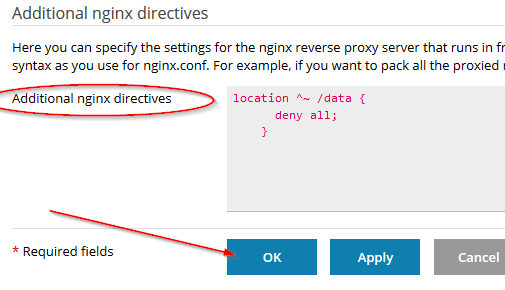
Confirm with OK.
If you are on shred Hosting and do not have the right to adjust directives, you have to create a .htaccess-file in data-directory with ftp or file-manager.
The content should be:
# line below if for Apache 2.4
<ifModule mod_authz_core.c>
Require all denied
</ifModule>

# line below if for Apache 2.2
<ifModule !mod_authz_core.c>
deny from all
Satisfy All
</ifModule>

# section for Apache 2.2 and 2.4
<ifModule mod_autoindex.c>
IndexIgnore *
</ifModule>
Step 3: Create Database for Contacts in Rainloop (optional)
This step is optional because Rainloop can store contacts within its own SQLite instance even without a MySQL database.
We add a Database in our subdomain by clicking Add Database:

and we enter the required values, for example the following ones (Please note the username, password and database name):
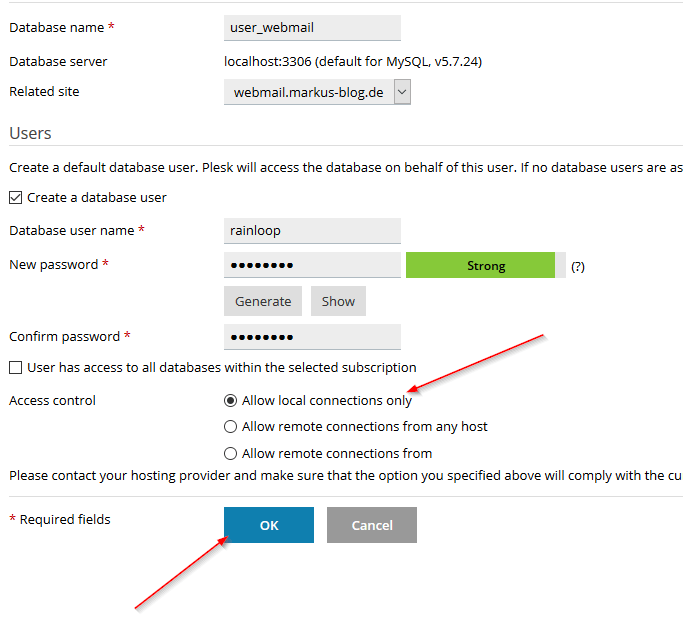
Confirm with OK.
Step 4: Installation of RainLoop Webmail
First we have to download the Installer-Script here.
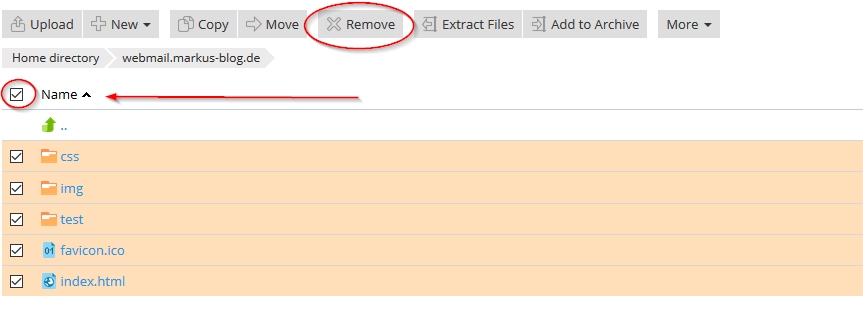
Then we go to File Manager in our Subdomain, Select and Remove all Content:
Upload the downloaded Installer-Script (installer.php):
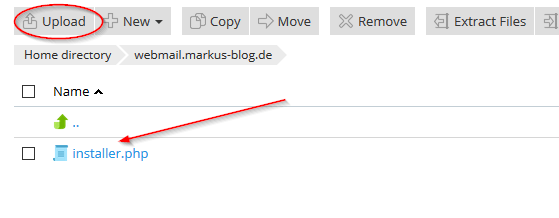
and call the installer.php in your webbrowser: https://webmail.yourdomain.tld/installer.php. This will create the following output:

Step 5: Configuration of RainLoop Webmail
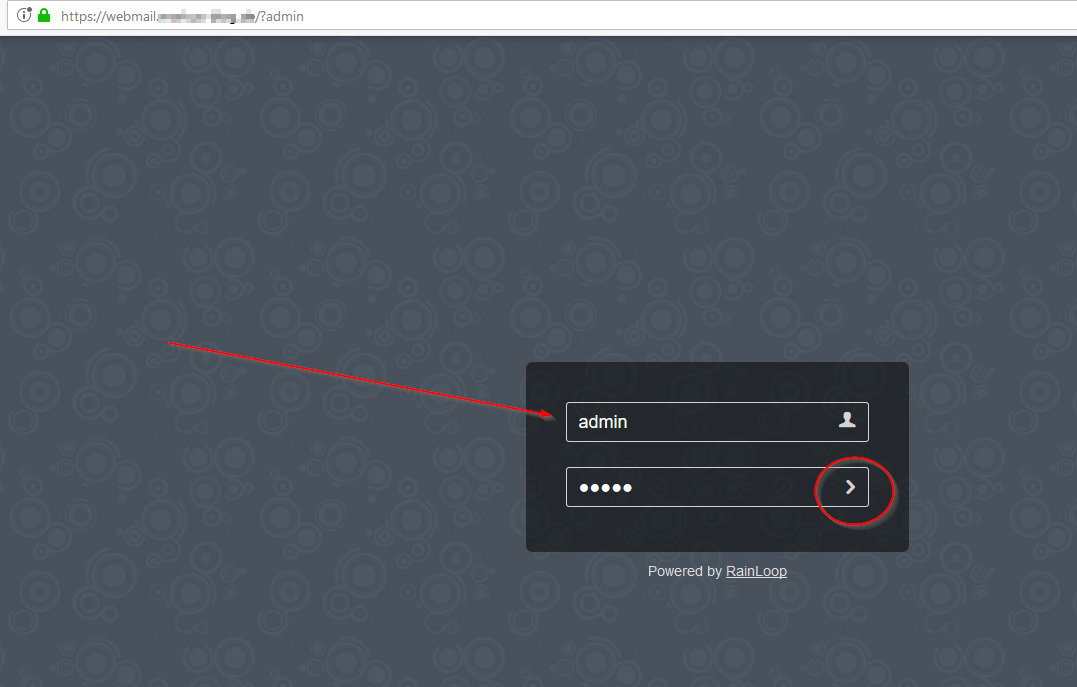
To configure our new RainLoop Webmail Solution, we have to enter the admin interface:
https://webmail.yourdomain.tld/?admin
the default credentials are admin with password 12345:
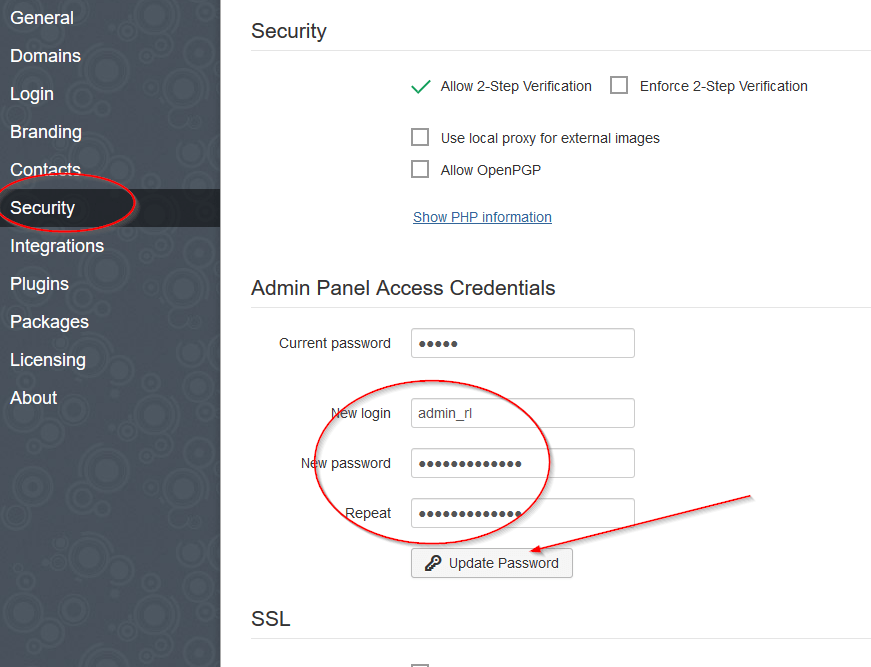
First of all we should change the credentials in the Security-Tab and enable Two-Factor-Authentication:
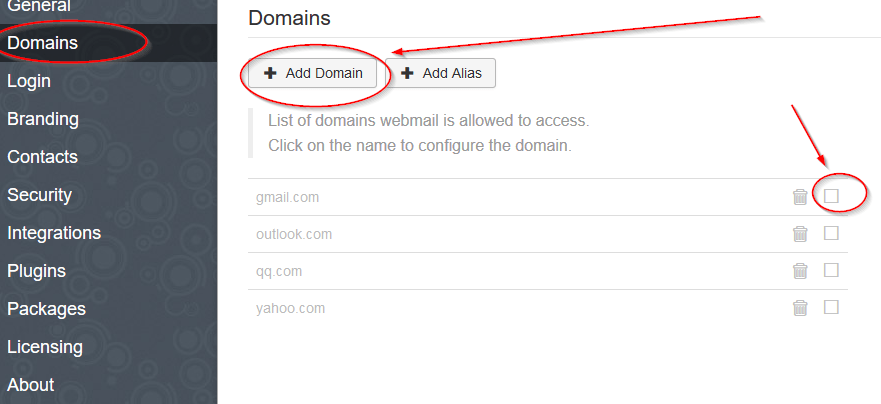
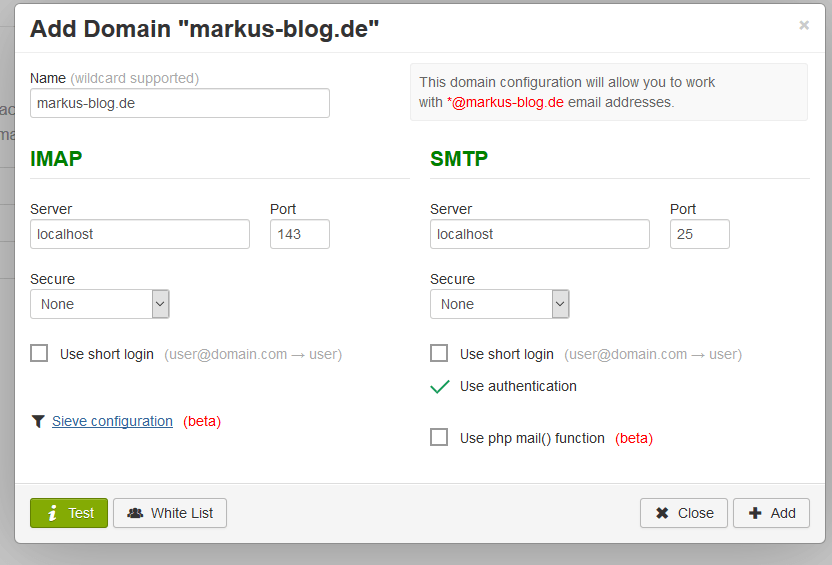
Before we will able to use Webmail, we have to add the domain or domains you want to allow to use RainLoop in the Domain-Tab and do not forget to disable or delete active domains (as example gmail):
In the next dialog we have to enter the required information to connect to our mailserver per imap and smtp, I will use no encryption, because I use my local mailserver. When you use an external mailserver please use encryption!
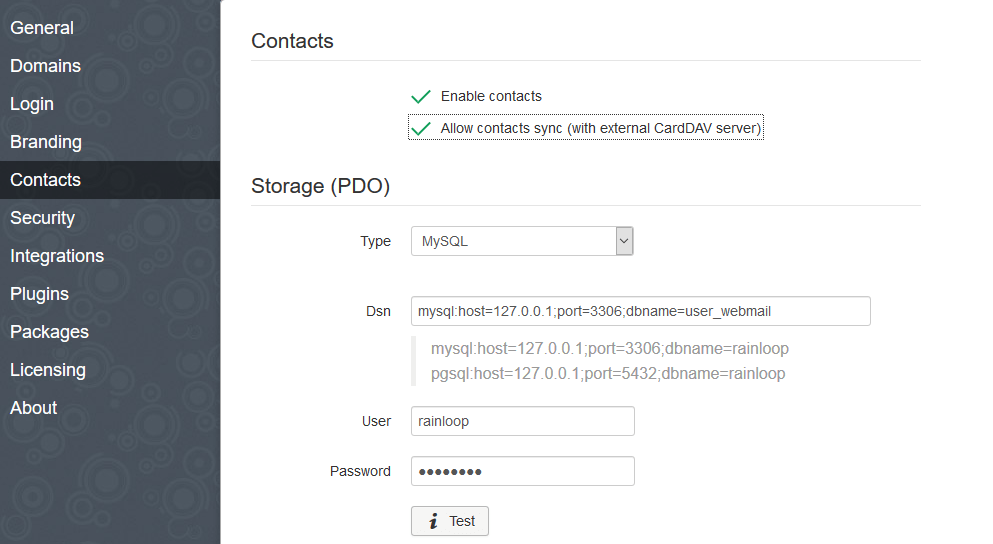
Next we go to Tab Contacts and activate them. We do not forget to enter our Database-Connection if we create a MySQL-Instance for RainLoop in Step 3:
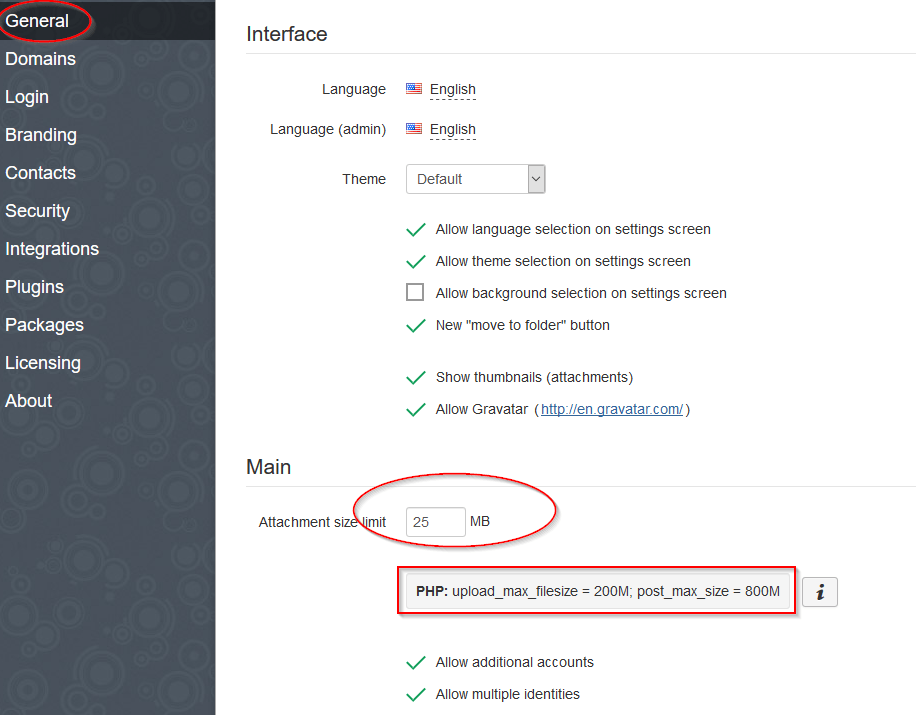
In the Tab General we may adjust Attachment size limit and Interface Settings for example Language:
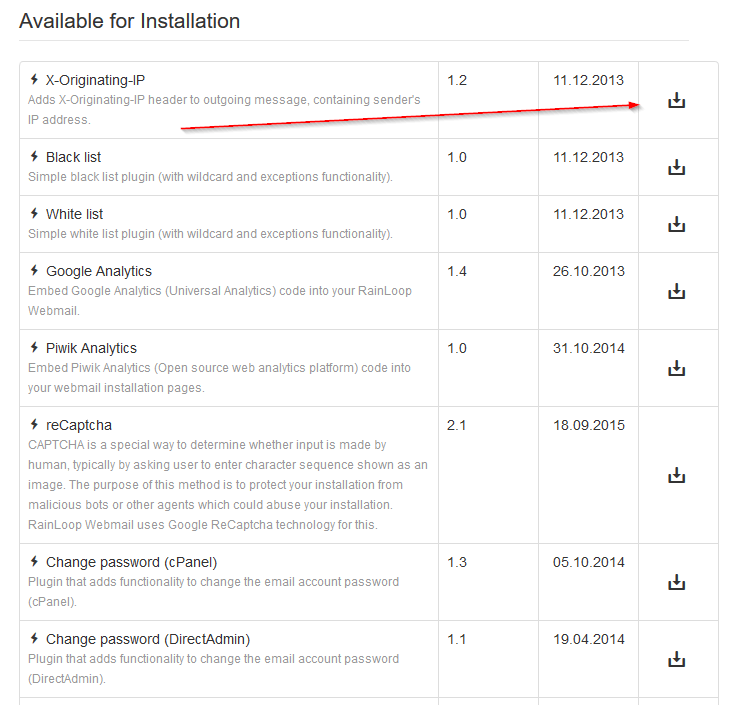
and in the Plugins Tab we are able to activate Plugins:
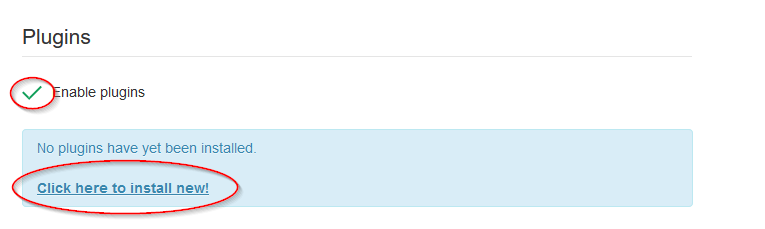
which we can install in the Packages Tab:
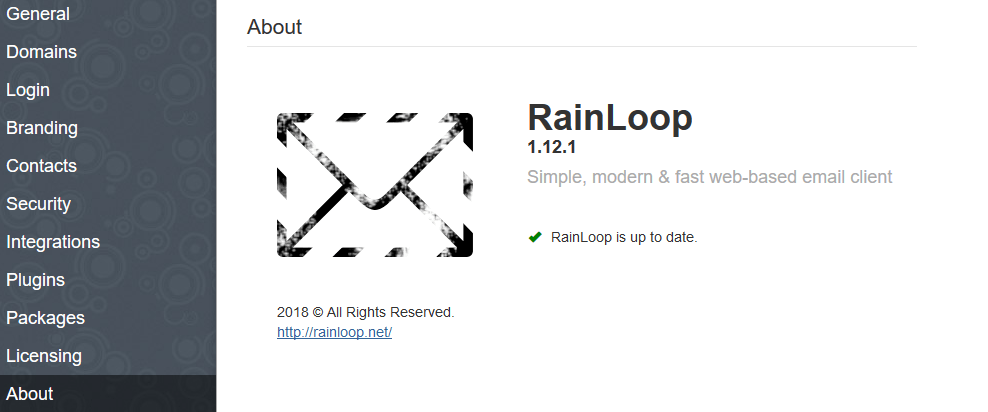
In the Tab About, we should check for an update:
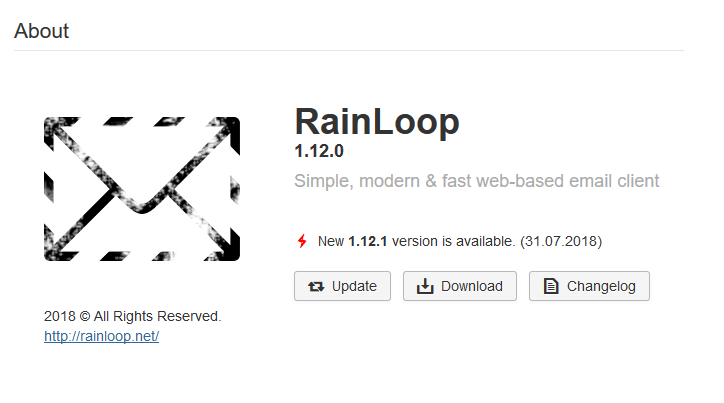
If an update is available, we can install it by clicking Update:
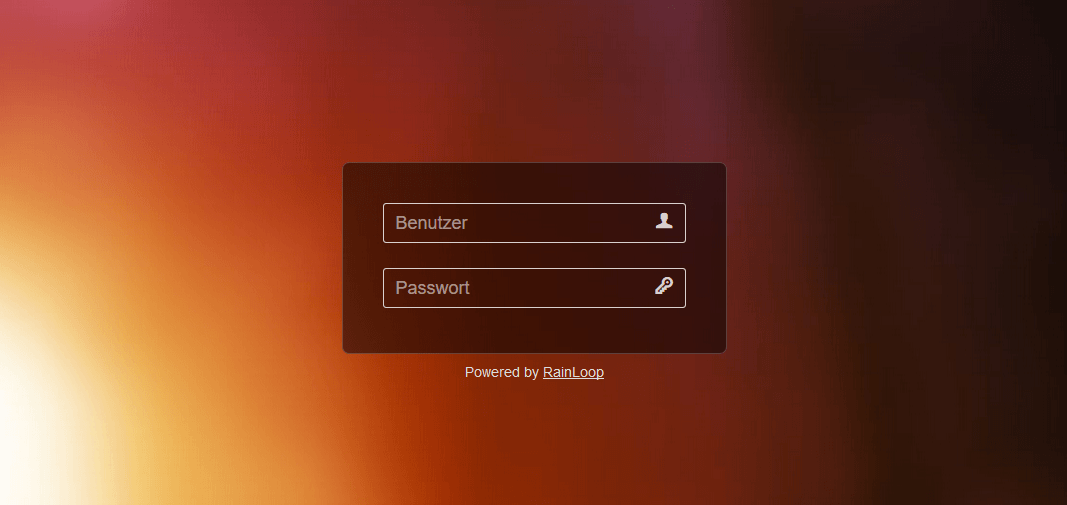
Now our new RainLoop Webmail is available at our Subdomain https://webmail.yourdomain.tld:
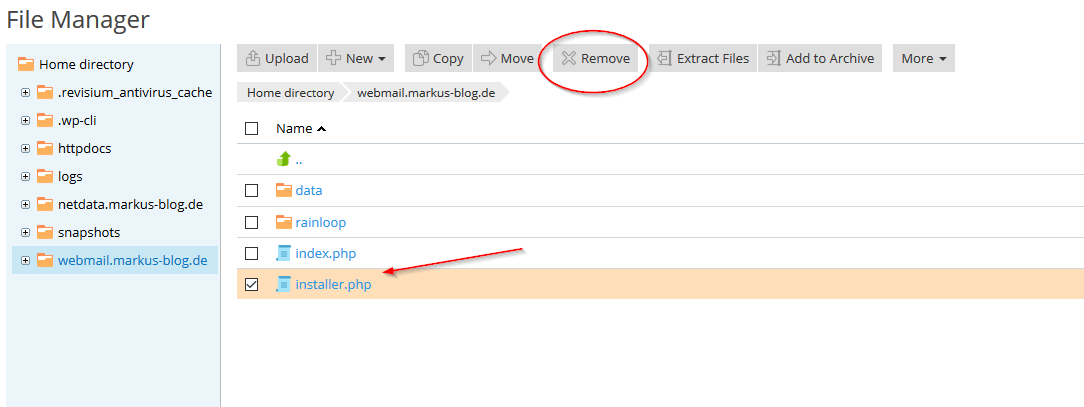
At the end of this step we have to remove the installer.php in the webspace of our Subdomain with the File Manager:
If we want to use this webmail for other domains, we can follow the next step to register RainLoop as Webmail Solution in Plesk.
Step 6: Configuration of Plesk (optional)
In this step we will register the new Webmail Solution in Plesk.
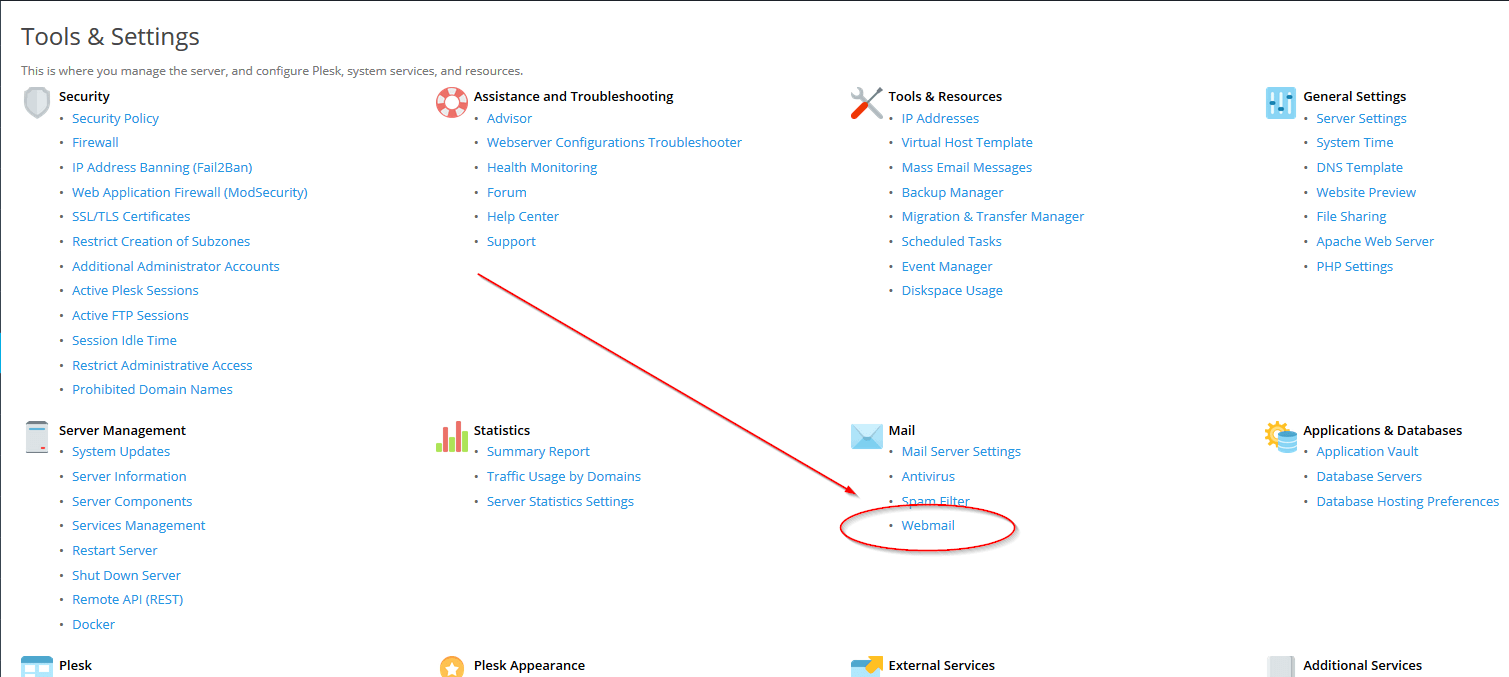
Go to Tools & Settings and Webmail under Mail in Plesk
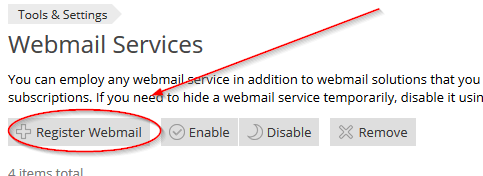
and in the next dialog we will add our RainLoop with Register Webmail:
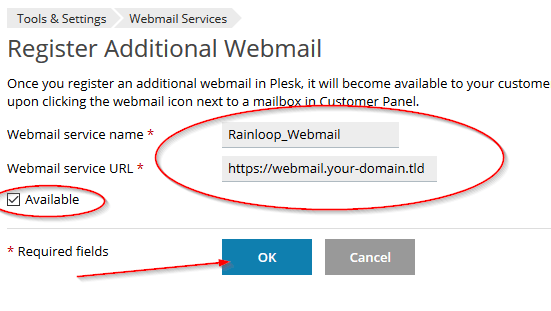
and enter our URL and Webmail-Name:
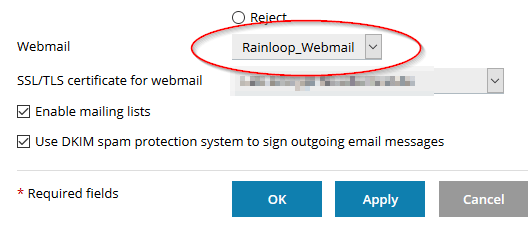
Now we can change the Webmail in other domains in Mail Settings:
Finished 🙂 Try it out, Share it and don’t hesitate to contact me. See you soon…