Changes:
– English Translation
– apache2-vhost
– Add Instructions for more than one nextcloud-domain
– Renew Screenshots
– Add Links to Troubleshooting Guides
In this guide i will show you how to deploy Collabora Office with Apache2 and Docker to integrate in Nextcloud.
Requirements:
– one Ubuntu VPS
– LAMP stack installed
– Apache2 Reverse Proxy Modules activated
– Docker installed
– certbot installed
– DNS-A record for Apache2-vHost
– Working Nextcloud installation with Collabora online app
If requirements are missing please use this:
LAMP stack:
sudo apt-get install lamp-server^
Apache2 modules:
sudo a2enmod proxy
sudo a2enmod proxy_http
sudo a2enmod ssl
sudo a2enmod proxy_https
sudo a2enmod proxy_ajp
sudo a2enmod rewrite
sudo a2enmod deflate
sudo a2enmod headers
sudo a2enmod proxy_balancer
sudo a2enmod proxy_connect
sudo a2enmod proxy_html
sudo a2enmod proxy_wstunnel
Docker:
Version from official Ubuntu Repository:
sudo apt-get install docker.io
sudo systemctl start docker
sudo systemctl enable docker
or directly from Docker:
sudo curl -sSL https://get.docker.com/ | CHANNEL=stable sh
sudo systemctl enable docker.service
sudo systemctl start docker.service
Certbot:
sudo apt-get update
sudo apt-get install software-properties-common
sudo add-apt-repository ppa:certbot/certbot
sudo apt-get update
sudo apt-get install python-certbot-apache
when finished, we can continue with Step 1.
Step 1: Collabora
Connect via ssh to host and deploy Docker container for one nextcloud-domain:
docker run -t -d -p 127.0.0.1:9980:9980 -e 'domain=subdomain\\.domain\\.com' -e 'username=UserName' -e 'password=Your-Password' --cap-add MKNOD collabora/code
or for more than one nextcloud-domain:
docker run -t -d -p 127.0.0.1:9980:9980 -e 'domain=subdomain1\\.domain\\.com|subdomain2\\.domain\\.com' -e 'username=UserName' -e 'password=Your-Password' --cap-add MKNOD collabora/code
Please insert here your subdomain, on which Nextcloud runs, afterwards with
docker pscheck whether container is active.
Step 2: Apache2
create apache2-vHost for collabora:
sudo nano /etc/apache2/sites-available/002-office.your-domain.tld.conf
Content (adjust according your domain):
<VirtualHost *:80>
        # The ServerName directive sets the request scheme, hostname and port that
        # the server uses to identify itself. This is used when creating
        # redirection URLs. In the context of virtual hosts, the ServerName
        # specifies what hostname must appear in the request's Host: header to
        # match this virtual host. For the default virtual host (this file) this
        # value is not decisive as it is used as a last resort host regardless.
        # However, you must set it for any further virtual host explicitly.
        ServerName office.your-domain.tld

        ServerAdmin webmaster@your-domain.tld
        DocumentRoot /var/www/html

        # Available loglevels: trace8, ..., trace1, debug, info, notice, warn,
        # error, crit, alert, emerg.
        # It is also possible to configure the loglevel for particular
        # modules, e.g.
        #LogLevel info ssl:warn

        ErrorLog ${APACHE_LOG_DIR}/error.log
        CustomLog ${APACHE_LOG_DIR}/access.log combined

        # For most configuration files from conf-available/, which are
        # enabled or disabled at a global level, it is possible to
        # include a line for only one particular virtual host. For example the
        # following line enables the CGI configuration for this host only
        # after it has been globally disabled with "a2disconf".
        #Include conf-available/serve-cgi-bin.conf
</VirtualHost>
activate vHost:
sudo a2ensite 002-office.your-domain.tld.conf
create LetsEncrypt-Certificate:
sudo certbot --authenticator standalone --installer apache -d office.your-domain.tld --pre-hook "service apache2 stop" --post-hook "service apache2 start"
and choose Option 2 (redirect), and edit the new conf:
sudo nano /etc/apache2/sites-available/002-office.your-domain.tld-le-ssl.conf
<VirtualHost *:443>
ServerName office.your-domain.tld:443

# SSL configuration, you may want to take the easy route instead and use Lets Encrypt!
SSLEngine on
SSLCertificateFile /etc/letsencrypt/live/office.deine-domain.tld/fullchain.pem
SSLCertificateKeyFile /etc/letsencrypt/live/office.deine-domain.tld/privkey.pem
SSLProtocol             all -SSLv2 -SSLv3
SSLCipherSuite ECDHE-ECDSA-CHACHA20-POLY1305:ECDHE-RSA-CHACHA20-POLY1305:ECDHE-ECDSA-AES128-GCM-SHA256:ECDHE-RSA-AES128-GCM-SHA256:ECDHE-ECDSA-AES256-GCM-SHA384:ECDHE-RSA-AES256-GCM-SHA384:DHE-RSA-AES128-GCM-SHA256:DHE-RSA-AES256-GCM-SHA384:ECDHE-ECDSA-AES128-SHA256:ECDHE-RSA-AES128-SHA256:ECDHE-ECDSA-AES128-SHA:ECDHE-RSA-AES256-SHA384:ECDHE-RSA-AES128-SHA:ECDHE-ECDSA-AES256-SHA384:ECDHE-ECDSA-AES256-SHA:ECDHE-RSA-AES256-SHA:DHE-RSA-AES128-SHA256:DHE-RSA-AES128-SHA:DHE-RSA-AES256-SHA256:DHE-RSA-AES256-SHA:ECDHE-ECDSA-DES-CBC3-SHA:ECDHE-RSA-DES-CBC3-SHA:EDH-RSA-DES-CBC3-SHA:AES128-GCM-SHA256:AES256-GCM-SHA384:AES128-SHA256:AES256-SHA256:AES128-SHA:AES256-SHA:DES-CBC3-SHA:!DSS
SSLHonorCipherOrder     on

# Encoded slashes need to be allowed
AllowEncodedSlashes NoDecode

# Container uses a unique non-signed certificate
SSLProxyEngine On
SSLProxyVerify None
SSLProxyCheckPeerCN Off
SSLProxyCheckPeerName Off

# keep the host
ProxyPreserveHost On

# static html, js, images, etc. served from loolwsd
# loleaflet is the client part of Collabora Online
ProxyPass           /loleaflet http://127.0.0.1:9980/loleaflet retry=0
ProxyPassReverse    /loleaflet http://127.0.0.1:9980/loleaflet

# WOPI discovery URL
ProxyPass           /hosting/discovery http://127.0.0.1:9980/hosting/discovery retry=0
ProxyPassReverse    /hosting/discovery http://127.0.0.1:9980/hosting/discovery

# Capabilities
ProxyPass           /hosting/capabilities http://127.0.0.1:9980/hosting/capabilities retry=0
ProxyPassReverse    /hosting/capabilities http://127.0.0.1:9980/hosting/capabilities

# Main websocket
ProxyPassMatch "/lool/(.*)/ws$" wss://127.0.0.1:9980/lool/$1/ws nocanon

# Admin Console websocket
ProxyPass   /lool/adminws wss://127.0.0.1:9980/lool/adminws

# Download as, Fullscreen presentation and Image upload operations
ProxyPass           /lool http://127.0.0.1:9980/lool
ProxyPassReverse    /lool http://127.0.0.1:9980/lool
<VirtualHost>
save conf and reload apache2:
sudo systemctl reload apache2
then check access to Collabora at the following Admin-URL:
https://office.your-domain.tld/loleaflet/dist/admin/admin.html
Step 3: Nextcloud
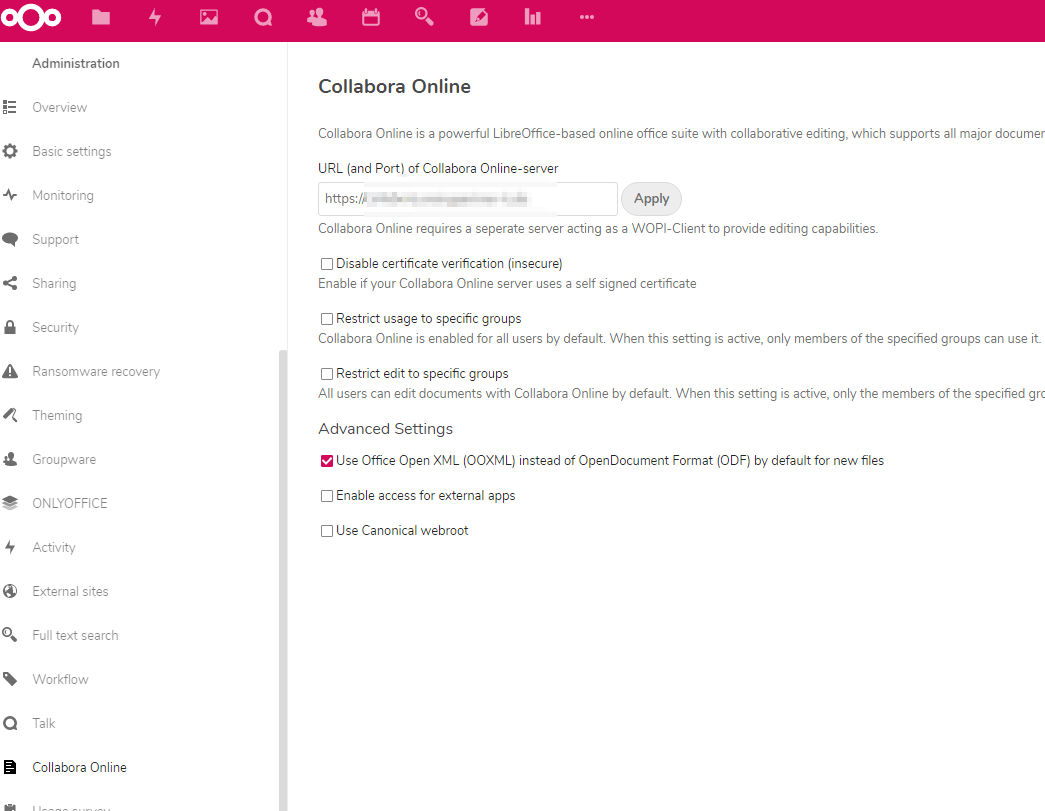
Activate the Collabora Online app in Nextcloud and enter the subdomain of your Collabora vHost.

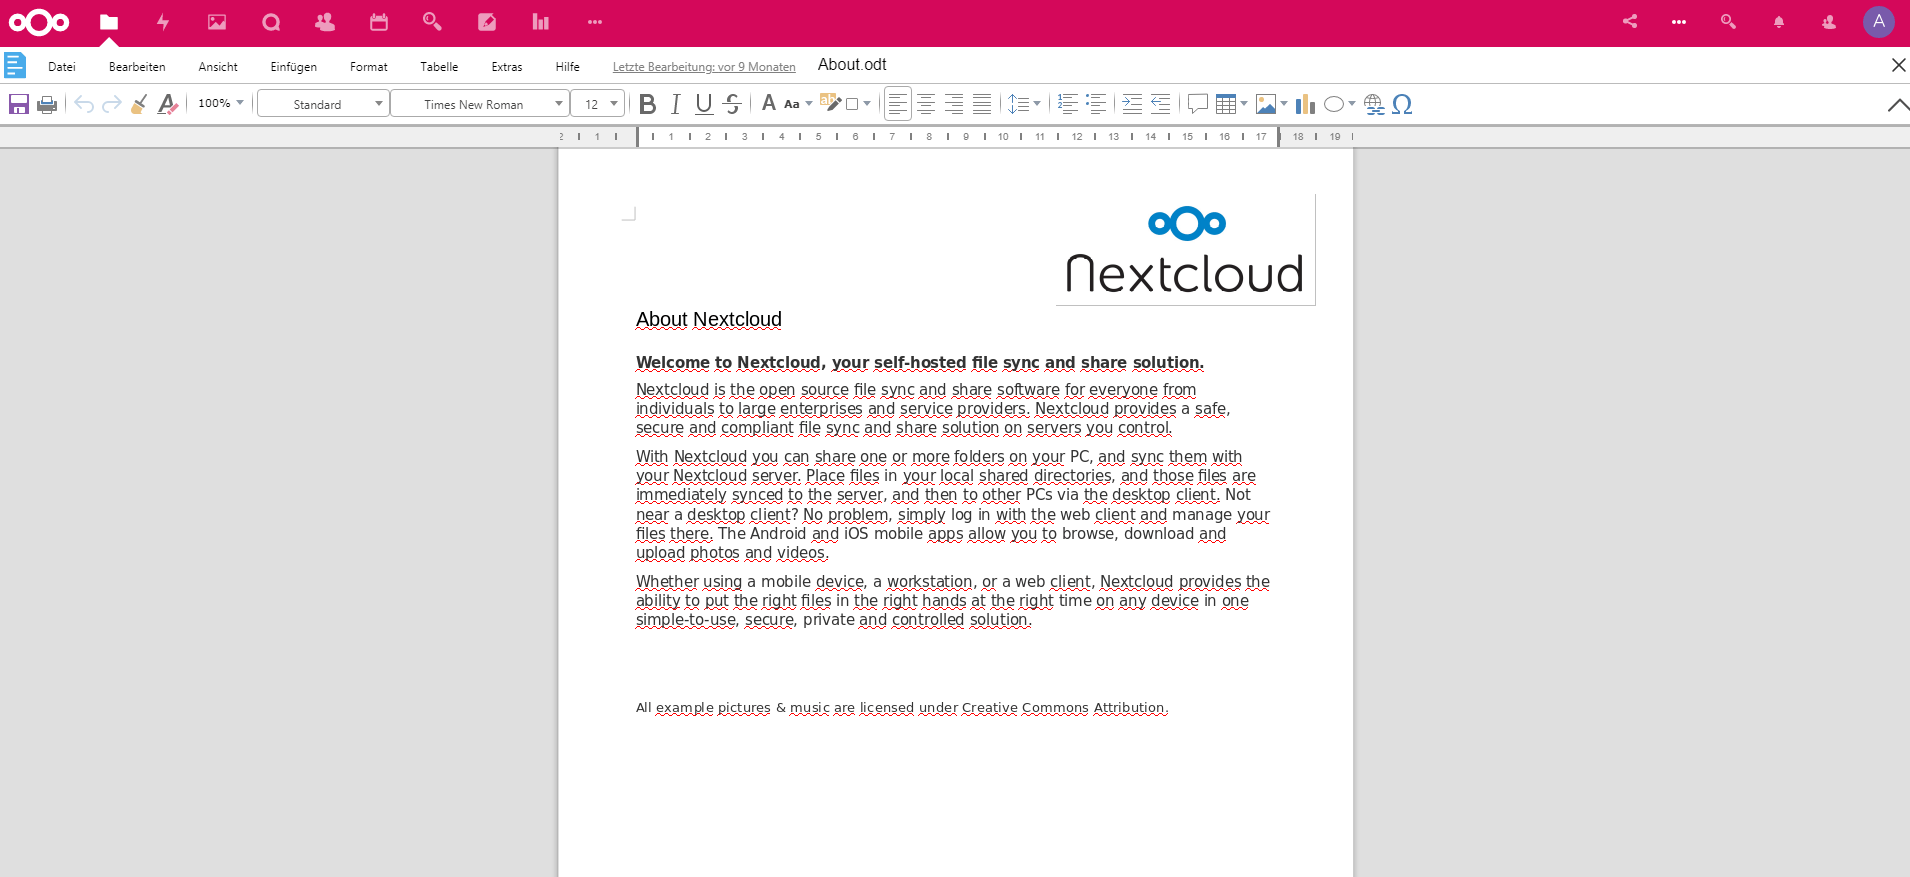
Now you can edit any document directly in the browser:

That’s it and Happy Nextclouding! 😉
If you get in trouble, please check this Guides:
Troubleshooting Nextcloud in Plesk mit Docker und OnlyOffice- oder Collabora-Image
Troubleshooting Nextcloud in Plesk mit Docker und OnlyOffice- oder Collabora-Image Teil 2
Do you have Plesk?
How to deploy Collabora Online Office without Docker in Plesk and connect to Nextcloud on Ubuntu